
Estimated reading time: 17 minutes
Learn the exact timing for perfectly boiled chicken breast every time. Get juicy, tender results for shredding, salads, and more! Find out how long to boil chicken breast.
Boiling chicken breast might seem simple. However, achieving perfectly cooked, juicy chicken requires knowing the right technique. Many home cooks struggle with dry or rubbery results. This often happens due to incorrect cooking times. Understanding how long to boil chicken breast is therefore crucial. This guide provides everything you need. Consequently, you’ll master boiling chicken breast for various uses. We cover factors affecting time, step-by-step instructions, and tips for flavor. Additionally, we’ll address common questions and problems. Prepare to elevate your meal prep and recipes.
Table of contents
- Why Boil Chicken Breast? The Simple Benefits
- Understanding Chicken Breast Boiling Times
- Step-by-Step Guide: How Long to Boil Chicken Breast
- Precise Boiling Times for Different Needs
- How to Tell When Boiled Chicken Breast is Done
- The Danger of Overcooking: Can You Overboil Chicken?
- Flavoring Your Boiled Chicken: Beyond Plain Water
- What to Do with Boiled Chicken Breast
- Storing and Reheating Boiled Chicken Safely
- Troubleshooting Common Boiling Problems
- Frequently Asked Questions (FAQs) about How Long to Boil Chicken Breast
- Final Thoughts on Mastering Boiled Chicken Breast
Why Boil Chicken Breast? The Simple Benefits
Boiling is a straightforward cooking method. It offers several advantages, especially for chicken breast. Many people choose boiling for health and convenience. Let’s explore why it’s a popular choice.
Ease and Convenience
Boiling requires minimal active cooking time. Basically, you place the chicken in liquid and let it simmer. This frees you up to prepare other parts of your meal. Furthermore, cleanup is generally quite easy. You typically only need one pot. This makes boiling chicken a practical option for busy weeknights. It’s unquestionably a simple cooking technique.
Healthy Cooking Method
Boiling is a lean cooking method. Unlike frying or sautéing, it requires no added fat. The chicken cooks gently in water or broth. This helps keep the calorie count lower. Moreover, boiling retains moisture well when done correctly. This results in tender chicken without extra oils. It’s a great choice for health-conscious individuals.
Perfect for Meal Prep
Boiled chicken is incredibly useful for meal prepping. You can cook a batch at the beginning of the week. Then, use the cooked chicken in various meals. For example, add it to salads, sandwiches, wraps, or grain bowls. Having pre-cooked protein readily available saves significant time during busy days. Thus, boiling supports efficient weekly meal planning.
Great Base for Other Recipes
Boiled chicken serves as a blank canvas. Its mild flavor makes it adaptable to countless recipes. You can shred it for tacos or BBQ sandwiches. Alternatively, dice it for chicken salad or casseroles. Use it in soups, pasta dishes, or stir-fries. Knowing how long to boil chicken breast ensures you have perfectly cooked chicken ready for any culinary creation.
Understanding Chicken Breast Boiling Times
Several factors influence how long to boil chicken breast. It’s not a one-size-fits-all answer. Understanding these variables helps achieve consistent results. Let’s look at the key elements affecting cooking duration.
Factors Affecting How Long to Boil Chicken Breast
The primary factors include the chicken’s size, thickness, and whether it’s bone-in or boneless. Additionally, starting with fresh versus frozen chicken makes a difference. The temperature of the cooking liquid and the intensity of the boil also play roles. Considering these elements allows for more accurate timing.
Size and Thickness Matter Most
Thickness is arguably the most critical factor. A thicker chicken breast naturally takes longer to cook through. Comparatively, a thinner breast cooks much faster. Always consider the thickest part of the breast when estimating time. Generally, larger breasts (over 8 ounces) need more boiling time than smaller ones (around 5-6 ounces). Uniformly sized pieces cook more evenly.
Bone-In vs. Boneless Chicken Breast
Bone-in chicken breasts typically require more cooking time. The bone insulates the meat slightly. This means heat takes longer to penetrate the center. Consequently, add approximately 5-10 minutes to the boiling time for bone-in breasts compared to boneless ones of similar size. The bone can, however, add flavor and help retain moisture.
Fresh vs. Frozen Chicken
You can boil chicken from frozen. However, it’s generally not recommended for the best texture. Boiling frozen chicken significantly increases the cooking time. Expect to add at least 50% more time. For instance, a breast usually needing 15 minutes might require 23-25 minutes if frozen. Furthermore, the outer part may overcook while the center is still thawing and cooking. For optimal results, it’s best to thaw chicken completely before boiling. This ensures more even cooking and better texture. Knowing how long to boil chicken breast accurately relies on starting with thawed meat.
Step-by-Step Guide: How Long to Boil Chicken Breast
Boiling chicken breast is straightforward. Following these steps ensures juicy, perfectly cooked results. We’ll guide you from preparation to resting.
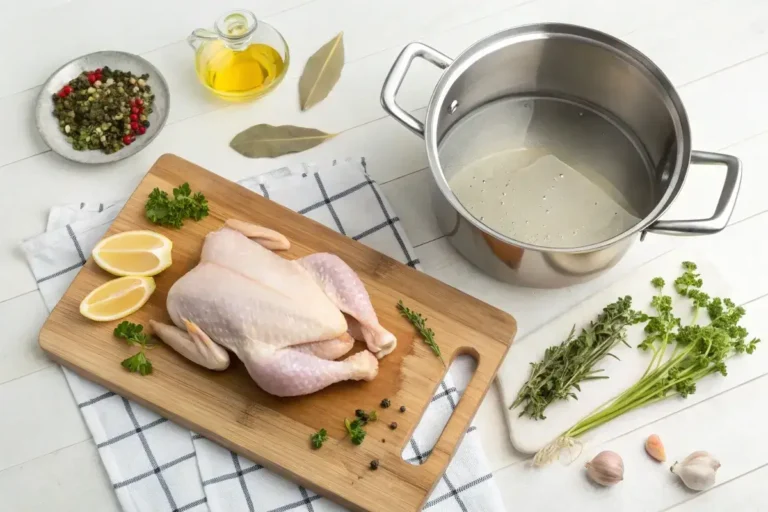
Gathering Your Equipment
You need minimal equipment for boiling chicken.
- A large pot or Dutch oven: Ensure it’s big enough to hold the chicken comfortably without crowding. The chicken should be fully submerged in liquid.
- Tongs: Useful for safely adding and removing chicken from hot water.
- Meat thermometer: Essential for accurately checking internal temperature. This is the best way to confirm doneness.
- Cutting board and knife: For any prep or for slicing/dicing after cooking.
Preparing the Chicken
Start with fresh or fully thawed chicken breasts. Trim any excess fat if desired. For more even cooking, you can gently pound the thicker end of the breast. This creates a more uniform thickness. However, this step is optional. Pat the chicken dry with paper towels before adding it to the pot.
Choosing Your Liquid and Flavorings
While you can use plain water, adding flavor enhances the chicken. Consider using:
- Chicken broth or vegetable broth: Adds depth and savory notes.
- Aromatics: Add halved onions, garlic cloves, celery stalks, or carrot chunks to the water.
- Herbs: Include sprigs of fresh parsley, thyme, rosemary, or a bay leaf.
- Seasoning: Always add salt and black peppercorns to the liquid. This seasons the chicken as it cooks.
Fill the pot with enough liquid to cover the chicken by about an inch. Add your chosen flavorings and bring the liquid to a boil first. Initially, this helps create a more flavorful cooking environment.
The Boiling Process Explained
- Bring Liquid to a Boil: Place your chosen liquid and flavorings in the pot. Bring it to a rolling boil over medium-high heat.
- Add Chicken: Carefully lower the chicken breasts into the boiling liquid using tongs. Ensure they are fully submerged.
- Return to Simmer: The liquid temperature will drop. Allow it to return to a boil, then immediately reduce the heat. You want a gentle simmer, not a vigorous boil. Specifically, look for small bubbles rising occasionally. Boiling too aggressively can make the chicken tough.
- Cover and Simmer: Cover the pot partially or fully. Let the chicken simmer gently. The exact how long to boil chicken breast time starts now.
- Check Doneness: Begin checking for doneness around the minimum estimated time based on size (see next section). Use a meat thermometer inserted into the thickest part.
Resting the Chicken
Once the chicken reaches the correct internal temperature (165°F or 74°C), remove it from the pot using tongs. Place it on a clean cutting board or plate. Let the chicken rest for 5-10 minutes before slicing or shredding. Resting allows the juices to redistribute throughout the meat. Consequently, this results in a more tender and flavorful chicken breast. Skipping this step can lead to drier chicken.
Precise Boiling Times for Different Needs
Timing is key for perfectly boiled chicken. Here are guidelines for various situations. Remember, these are estimates. Always rely on a meat thermometer for accuracy.
Boiling Time for Boneless, Skinless Chicken Breast (Average Size)
For average-sized (6-8 oz) boneless, skinless chicken breasts:
- Simmer for 12-16 minutes.
- Start checking the internal temperature around the 12-minute mark.
- Ensure the thickest part reaches 165°F (74°C).
Smaller breasts (under 6 oz) might only need 10-12 minutes. Larger breasts (over 8 oz) could require 18-20 minutes or slightly more. Understanding how long to boil chicken breast often means adjusting for size.
How Long to Boil Chicken Breast for Shredding
If your goal is shredded chicken, slightly longer cooking can be beneficial. It makes shredding easier.
- Simmer average-sized boneless breasts for 15-20 minutes.
- Check the internal temperature reaches 165°F (74°C). The slightly longer time helps fibers break down more.
- After resting, use two forks to shred the chicken easily. The meat should pull apart with minimal effort. This duration is often cited when asking specifically how long to boil chicken breast for shredding purposes.
Boiling Time for Bone-In Chicken Breast
Bone-in breasts take longer to cook. The bone affects heat transfer.
- For average-sized bone-in breasts, simmer for 20-25 minutes.
- Again, use a meat thermometer. Insert it into the thickest part, avoiding the bone.
- Confirm the internal temperature reaches 165°F (74°C). Larger bone-in pieces may need closer to 30 minutes.
Adjusting Time for Larger or Smaller Breasts
Always adjust the estimated time based on the specific pieces you are cooking.
- Smaller Breasts (under 6 oz): Check around 10 minutes. Total time likely 10-12 minutes.
- Larger Breasts (over 8-10 oz): Start checking around 16-18 minutes. Total time could be 18-22 minutes or more.
- Very Thick Breasts: These need the most time. Allow ample cooking duration and rely heavily on the thermometer reading. Properly estimating how long to boil chicken breast requires observing the meat itself.
How to Tell When Boiled Chicken Breast is Done
Ensuring chicken is fully cooked is crucial for food safety. Relying solely on time isn’t foolproof. Use these methods to confirm doneness.
Using a Meat Thermometer: The Gold Standard
An instant-read meat thermometer is the most reliable tool.
- Insert the thermometer probe into the thickest part of the chicken breast. Avoid touching any bones if using bone-in chicken.
- The internal temperature must reach 165°F (74°C). This temperature ensures harmful bacteria are killed.
- Check multiple pieces if boiling several breasts, especially if they vary in size. Unquestionably, this is the safest method.
Visual Cues: Opaque and White
Visual checks can offer clues, but use them alongside a thermometer.
- Cut into the thickest part of the breast. The meat should be completely opaque and white.
- There should be absolutely no pinkness remaining. If you see pink, continue simmering for a few more minutes and check again.
Checking the Juices
Pierce the chicken with a fork or the tip of a knife.
- The juices that run out should be clear, not pink or reddish.
- Cloudy juices might indicate it needs a little more time. Clear juices generally mean it’s cooked through. However, this method is less precise than using a thermometer.
Avoiding Undercooked Chicken
Undercooked chicken poses health risks, such as Salmonella poisoning. Therefore, always err on the side of caution. If unsure, cook it a little longer. Using a meat thermometer eliminates guesswork and ensures safety. Correctly determining how long to boil chicken breast is vital for safety.
The Danger of Overcooking: Can You Overboil Chicken?
Yes, you can definitely overcook chicken by boiling. While boiling adds moisture, prolonged cooking at simmering temperatures eventually makes chicken tough, dry, and rubbery. Understanding how long to boil chicken breast means avoiding this pitfall too.
What Happens When Chicken is Overboiled?
As chicken cooks, its proteins contract and expel moisture. If cooked for too long, especially at a vigorous boil, too much moisture is forced out. The muscle fibers become tight and chewy. Consequently, the chicken loses its tender texture. Even though it’s cooked in liquid, overboiled chicken tastes surprisingly dry.
Signs of Overcooked Chicken
Overcooked boiled chicken often has:
- A rubbery, bouncy texture when pressed.
- A dry, stringy appearance when cut or shredded.
- A bland taste, as flavorful juices have been lost.
- It might feel tough to chew.
Tips to Prevent Overboiling
- Simmer Gently: Avoid a rolling boil. Maintain a gentle simmer throughout the cooking process. High heat toughens proteins faster.
- Use a Timer: Set a timer based on the estimated how long to boil chicken breast for its size. Start checking early.
- Trust the Thermometer: Remove the chicken promptly once it reaches 165°F (74°C). Don’t let it sit in the hot water unnecessarily long after reaching temperature.
- Rest the Chicken: Allowing the chicken to rest helps it retain the remaining juices.
Flavoring Your Boiled Chicken: Beyond Plain Water
Boiling in plain water yields cooked chicken, but it can be bland. Infusing flavor during the boiling process makes a significant difference. Here are some ways to enhance the taste.
Using Broth or Stock
Substitute water with chicken broth, vegetable broth, or even bone broth. This is one of the easiest ways to add savory depth. Low-sodium broth allows better control over the saltiness. Indeed, this simple switch dramatically improves flavor.
Adding Aromatics (Onion, Garlic, Celery, Carrots)
Basic aromatic veggies add layers of flavor to the cooking liquid and chicken.
- Onion: A halved or quartered yellow or white onion.
- Garlic: A few smashed cloves of garlic.
- Celery: A stalk or two, roughly chopped.
- Carrots: One or two carrots, roughly chopped.
These items create a fragrant base, subtly perfuming the chicken.
Incorporating Herbs (Parsley, Thyme, Bay Leaf)
Fresh or dried herbs contribute complexity.
- Fresh Herbs: Add sprigs of parsley, thyme, or rosemary. Tie them together with kitchen twine (a bouquet garni) for easy removal.
- Dried Herbs: A bay leaf is classic for boiling. You can also add dried thyme or oregano. Use dried herbs sparingly as their flavor is concentrated.
Seasoning Basics: Salt and Pepper
Never forget seasoning. Add salt and whole peppercorns to the cooking liquid. The salt helps season the chicken from the inside out. Start with about 1 teaspoon of salt per quart of liquid and adjust as needed. Peppercorns provide a mild, warm spice. Properly seasoning the liquid is fundamental when considering how long to boil chicken breast for taste.
What to Do with Boiled Chicken Breast
Perfectly boiled chicken breast is incredibly versatile. Once you know how long to boil chicken breast, you have a fantastic base for countless meals. Here are some ideas:
Shredded Chicken for Tacos, Sandwiches, and Salads
Shredded chicken is a meal prep staple. Use it in:
- Tacos and Enchiladas: Mix with salsa or taco seasoning.
- BBQ Chicken Sandwiches: Toss with your favorite BBQ sauce.
- Chicken Salads: Combine with mayonnaise, celery, and onion.
- Soups and Chilis: Add to chicken noodle soup or white chicken chili.
- Pasta Dishes: Stir into creamy pasta sauces.
Diced Chicken for Soups and Casseroles
Dice the cooked chicken for easy incorporation into various dishes:
- Chicken Pot Pie: A classic comfort food filling.
- Casseroles: Add to broccoli and cheese casserole or chicken and rice bakes.
- Soups: Perfect for hearty chicken and vegetable soups.
- Fried Rice: A quick addition to homemade fried rice.
Sliced Chicken for Quick Meals
Slice the boiled chicken breast for simple, healthy meals:
- Salad Topping: Add lean protein to green salads.
- Sandwiches and Wraps: Layer with lettuce, tomatoes, and your favorite spread.
- Quick Snacks: Enjoy slices on crackers or with veggie sticks.
- Grain Bowls: Combine with quinoa, roasted veggies, and a drizzle of dressing.
Using the Cooking Liquid (Broth)
Don’t discard the flavorful liquid left after boiling! If you added aromatics and seasonings, you’ve created a light chicken broth.
- Strain the liquid through a fine-mesh sieve.
- Use it as a base for soups or stews.
- Cook grains like rice or quinoa in it for extra flavor.
- Store it in the refrigerator for 3-4 days or freeze it for later use. This adds value beyond just knowing how long to boil chicken breast.
Storing and Reheating Boiled Chicken Safely
Proper storage and reheating are important for food safety and quality. Follow these guidelines.
Cooling Down Properly
Allow the boiled chicken to cool slightly after resting. However, don’t leave it at room temperature for more than 2 hours (or 1 hour if the ambient temperature is above 90°F or 32°C). Bacteria can multiply rapidly in the “danger zone” between 40°F and 140°F (4°C and 60°C). Afterward, prepare it for storage.
Refrigeration Guidelines
- Store cooked chicken in airtight containers or resealable plastic bags.
- Refrigerate within 2 hours of cooking.
- Properly stored boiled chicken lasts for 3-4 days in the refrigerator.
- Keep it separate from raw meats to prevent cross-contamination.
Freezing Boiled Chicken
Boiled chicken freezes well. This is great for long-term meal prep.
- Ensure the chicken is completely cool.
- Store it shredded, diced, or whole in airtight freezer bags or containers. Remove as much air as possible to prevent freezer burn.
- Label the container with the date.
- Frozen boiled chicken maintains good quality for 2-4 months. While safe indefinitely if kept frozen at 0°F (-18°C), quality declines over time.
Reheating Methods
Reheat boiled chicken gently to avoid drying it out.
- Microwave: Place chicken in a microwave-safe dish. Add a splash of water or broth to keep it moist. Cover and heat until warmed through (internal temperature reaches 165°F or 74°C).
- Stovetop: Heat chicken in a pan over medium-low heat with a little broth or water. Cover the pan to trap steam.
- Oven: Wrap chicken in foil with a splash of liquid. Reheat in a preheated oven at around 350°F (175°C) until hot.
- In Soups/Stews: Add cold or thawed chicken directly to simmering soups or sauces during the last few minutes of cooking.
Always ensure reheated chicken reaches an internal temperature of 165°F (74°C).
Troubleshooting Common Boiling Problems
Even with careful planning, issues can arise. Here’s how to address common problems when boiling chicken breast.
Chicken is Dry or Rubbery
This is usually due to overcooking or boiling too vigorously.
- Solution: Pay close attention to the how long to boil chicken breast guidelines. Use a meat thermometer and remove chicken promptly at 165°F (74°C). Maintain a gentle simmer, not a hard boil. Ensure the chicken rests after cooking. If already overcooked, shredding it and mixing with a moist sauce (like BBQ or salsa) can help mask the texture.
Chicken is Still Pink Inside
This indicates undercooking, posing a food safety risk.
- Solution: Immediately return the chicken to the simmering liquid. Continue cooking for a few more minutes. Re-check the internal temperature with a thermometer in the thickest part, ensuring it reaches 165°F (74°C). Always verify doneness before serving.
Water Boiled Away Too Quickly
If the liquid level drops below the chicken during simmering:
- Solution: Add more hot water or broth to the pot as needed to keep the chicken submerged. Check the heat level; perhaps the simmer was too strong. Adjust the burner to maintain a gentler simmer. Covering the pot partially can also help reduce evaporation while still allowing steam to escape.
Frequently Asked Questions (FAQs) about How Long to Boil Chicken Breast
Here are answers to some common questions regarding boiling chicken breast.
The time varies based on size and thickness. Generally, an average-sized (6-8 oz) boneless, skinless chicken breast takes 12-16 minutes to boil (simmer) until it reaches an internal temperature of 165°F (74°C). Larger breasts need more time, smaller ones less. Bone-in breasts typically need 20-25 minutes. Always use a meat thermometer for accuracy.
For chicken that shreds easily, aim for a slightly longer cooking time. Boil (simmer) average-sized boneless, skinless breasts for 15-20 minutes. This helps the muscle fibers break down more, making shredding with two forks much easier after resting. Ensure the internal temperature still reaches 165°F (74°C). Knowing how long to boil chicken breast specifically for shredding is key for texture.
Yes, absolutely. Boiling chicken for too long, especially at a high boil instead of a gentle simmer, will result in dry, tough, and rubbery meat. The proteins contract tightly and expel too much moisture. It’s crucial to monitor the time and use a meat thermometer to remove the chicken promptly once it reaches 165°F (74°C).
The most reliable way is to use an instant-read meat thermometer. Insert it into the thickest part of the breast. It should register 165°F (74°C). Visually, the meat should be completely opaque white with no pinkness remaining. Additionally, the juices should run clear when pierced. However, the thermometer provides the definitive answer for safety and optimal texture.
Final Thoughts on Mastering Boiled Chicken Breast
Mastering how long to boil chicken breast transforms a simple technique into a reliable method for delicious, healthy meals. Remember the key factors: size, thickness, bone-in or boneless, and starting temperature. Always aim for a gentle simmer, not a vigorous boil. Furthermore, flavoring the cooking liquid significantly enhances the final product.
Undoubtedly, the most critical tool in your arsenal is a meat thermometer. It guarantees perfectly cooked, safe chicken every time, hitting that crucial 165°F (74°C) mark. Avoid the pitfalls of undercooking or overcooking by monitoring closely. Afterward, let the chicken rest to ensure maximum juiciness.
With these guidelines and a little practice, you’ll consistently produce tender, flavorful boiled chicken breast. It’s perfect for meal prep, quick dinners, and as a versatile base for countless recipes. Embrace the simplicity and health benefits of boiling chicken. Enjoy your perfectly cooked results.